
Available on: ❌ Lite ❌ Core ✅ Plus ✅ Enterprise
What is the Pre-Registration Calendar Feature?
The Pre-Registration Calendar allows visitors or contractors to be pre-registered before arriving on site. This helps speed up the sign-in process and gives users access to site branding, induction information, and sign-in steps before they arrive.
The Pre-Registration Feature is useful in a number of situations. Including
- Visitor Groups
- Contractor teams
- Scheduled events
- Large site arrivals
- Faster kiosk sign-in experiences
How Pre-Registration works for Visitors coming on site.
When a visitor/basic contractor is pre-registered by a System admin.
- They receive a pre-registration email or SMS, where they review the site sign-in information created by a SecurePass System Admin.
- Once this is completed. They are not automatically signed in
- Then, when they arrive on site. They will be required to complete the final kiosk sign-in step.
How to sign in as a Pre-Registered Visitor
Once the above steps have been completed, several approaches can be followed to sign in.
At the site Kiosk, pre-registered users can:
- Scan the QR code presented on screen or
- Search for their name manually under the Pre-Registered user tab.
- They can also scan any QR code poster and select the Pre-Registered option.
This approach aims to significantly reduce the time for on-site sign-in.
Note: If a Pre-Registered user selects any option other than Pre-Registered at the Kiosk. They will be signed in as a normal user and will have to acknowledge and agree to each sign-in step. Please ensure that they are selecting the right user type.
How to create a Pre Registration within SecurePass.
In order to create a Pre Registration. You must be a
- System Admin
- Be on a PLUS Subscription plan or above.
If you would like to have this feature turned on, please reach out to support@healthsafe.co
Before creating a pre-registration invite, make sure you have:
- Visitor or contractor names
- Email addresses or mobile numbers
- Event or arrival dates and times
- The correct site selected in SecurePass
Step 1 - Open the Pre-Registration Calendar
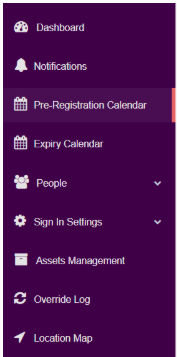
- Navigate to the Pre-Registration Calendar
2. Select the Create Invite option
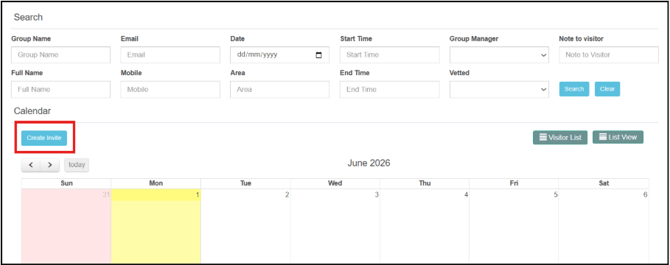
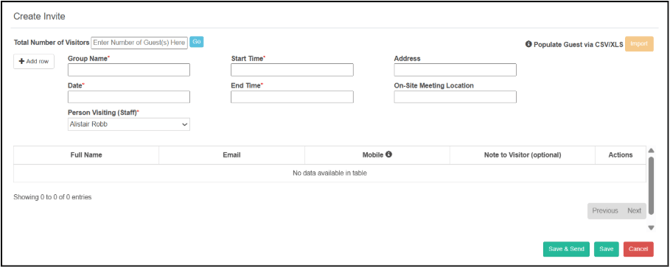
3. This will open the pre-registration setup screen.
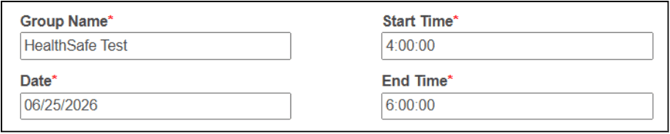
Step 2 - Enter the Group Details
1. Complete the event or visitor group details.
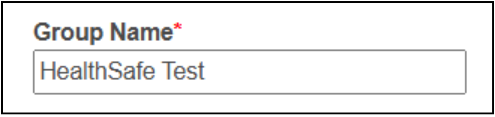
Group Name
The Group Name acts as the company or group reference.
For example:
- HealthSafe Test
If registering a large group, using one shared group name can make management easier.
Step 3 - Select the Event Date and Time
Enter:
- Start date
- Start time
- End time
- Entering these times is important because pre-registered users can only sign in within the allowed access window.
- Visitors can sign in up to one hour before the scheduled start time.
For example:
- Event Start Time: 4:00 PM
- Earliest Sign-In Time: 3:00 PM
If a visitor attempts to sign in too early, the system will not allow access.
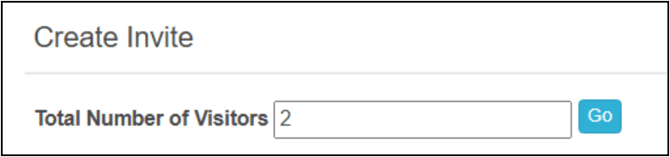
Step 4 – Set the Number of Visitors
Enter the number of visitors or contractors you want to include in the pre-registration.
Once entered, select Go to generate the visitor entry fields.
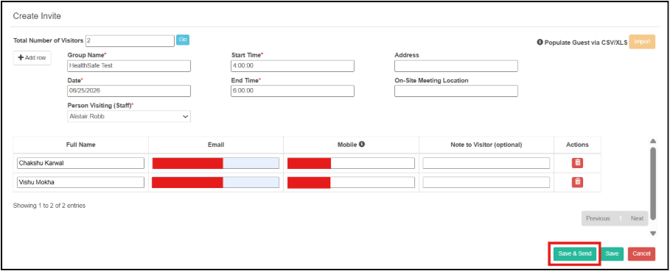
Step 5 – Enter Visitor Details
Add the details for each visitor, including:
- First name
- Last name
- Email address and/or mobile number
These contact details are used to send the pre-registration invitation.
Visitors can receive their invite via:
- SMS

Step 6 – Optional: Use the Group Manager Feature
SecurePass includes an optional Group Manager feature for large group arrivals.
How the Group Manager Feature works is that when one visitor is selected as the Group Manager:
- When that person signs in at the kiosk
- All other visitors in the group are automatically signed at the same time
This can significantly speed large group sign-ins and is recommended for users/situations such as
- Large event gatherings
- Group Inductions
- Tour Groups
- Meetings

Important Notes
- Only one badge/labeil will be printed out when using this feature.
- The printed badge will contain the Group Manager's details.
- But other visitors are still recorded as signed in within SecurePass as a pre-registered user.
Step 7 – Save and Send the Invitations
Once all visitor details are entered:
- Select Save and Send
- Invitations will automatically be sent to the visitors
Visitors will receive:
- A pre-registration email or SMS
- A QR code for faster sign-in
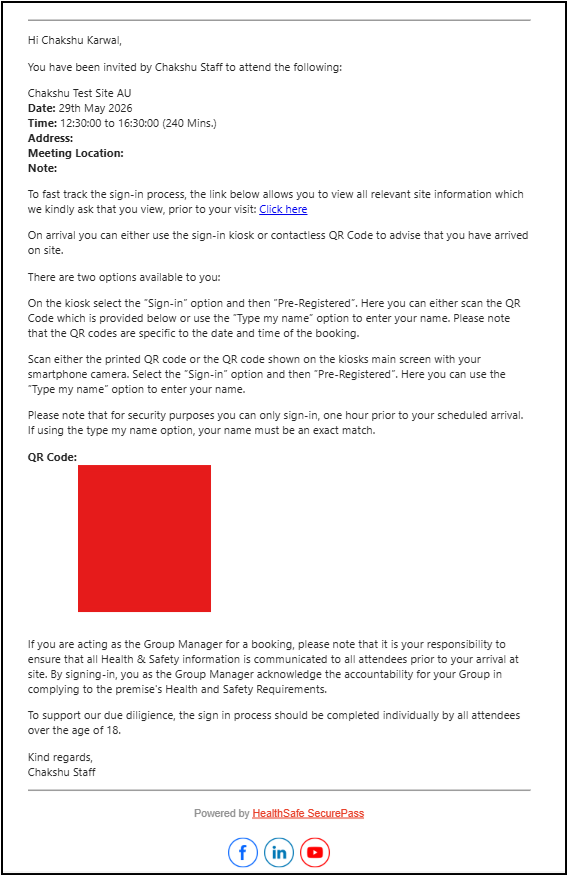
This is an example of the email notification visitors will receive when using the pre-registered feature.
What Visitors See Before Arrival
When visitors open the pre-registration link, they can:
- View company branding
- Read site information
- Review sign-in requirements
- Access their QR code
Important
Opening the pre-registration link does not sign the visitor into the site.
Visitors must still complete the final kiosk sign-in step on arrival.
Step 8 – Signing In On Site
When visitors arrive on site:
- Open the kiosk sign-in screen
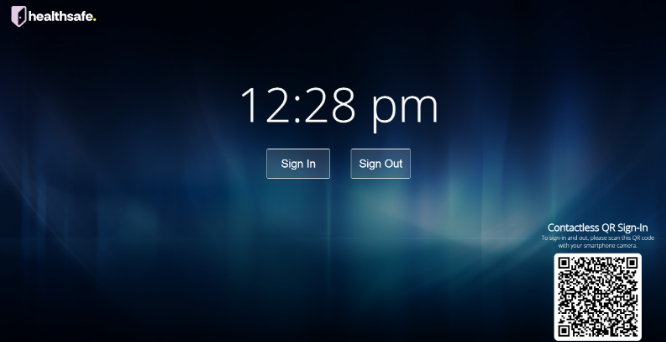
2. Select Pre-Registered
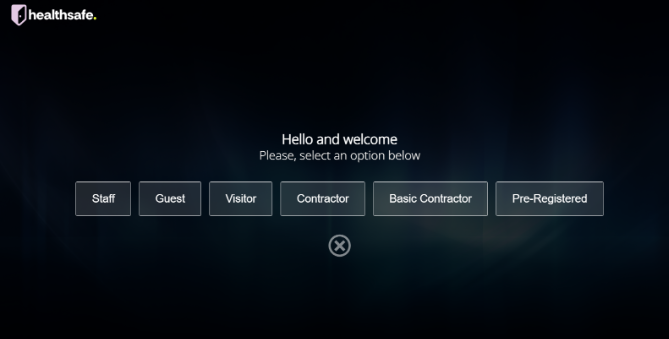
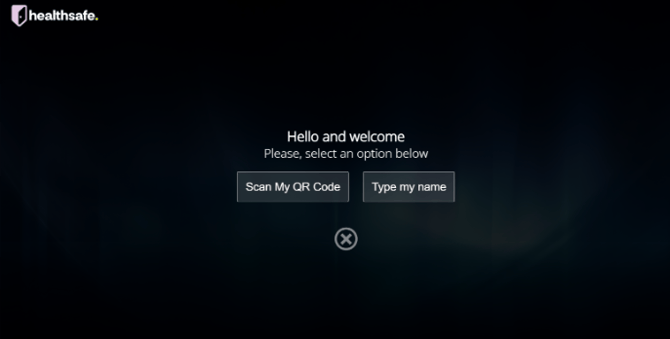
They can then:
- Scan their QR code, or type their name manually
Once completed:
-
- The visitor will be signed in
- A label/badge may print automatically if configured
Signing In With a QR Code
Visitors can use the QR code included in their email or SMS invitation.
To sign in:
- Open the QR code on their phone
- Hold the phone in front of the kiosk scanner
- Wait for the kiosk to process the sign-in
- Selecting Pre-Registered
- Typing their name into the kiosk
Manual Name Search Option
If a visitor does not have their QR code available, they can still sign in by:
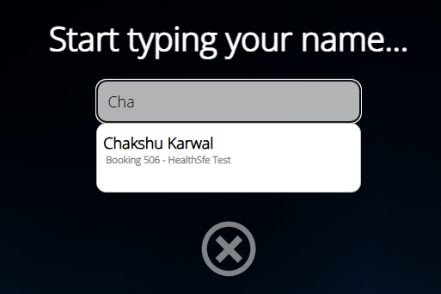
SecurePass will locate the pre-registration and complete the sign-in.

Best Practice Recommendations
For the best visitor experience:
- Create pre-registrations ahead of arrival day
- Double-check visitor email addresses and mobile numbers
- Ensure kiosk printers are connected and tested
- Use the Group Manager feature for large groups
- Encourage visitors to have their QR code ready before arriving
- For further assistance or questions regarding SecurePass, please contact our support team at support@healthsafe.co or visit our support page at Submit a support ticket (healthsafe.co.nz).